API Docs
Getting Started with Cronberry
With this page you will get started with Cronberry.
Introduction to Cronberry API
You can use this API for integrating your website or app so that you can create campaigns with Cronberry.
Prerequisite
To start integration via API, you need:
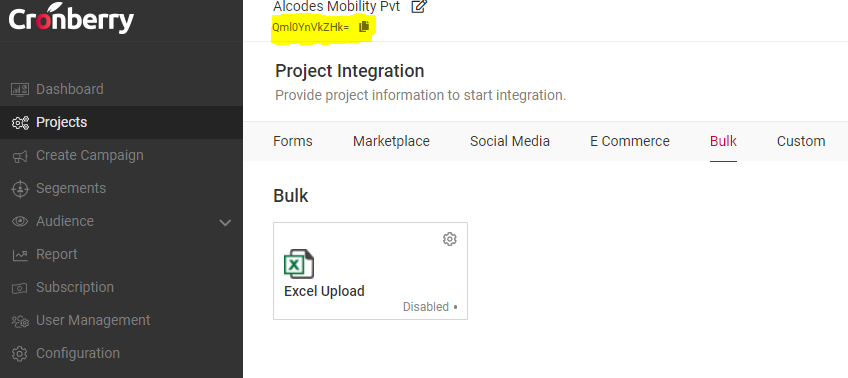
Project Key:- This is your account authentication id which is unique for every user project and required to identify users. It will be generated once you click on Integration Kit button in Project Integration screen.
Audience Id:-This is primary key which will be helpful to identify your subscribers uniquely.
API Reference
Endpoint URL:- https://api.cronberry.com/cronberry/api/campaign/register-audience-data
Note:- It is mandatory to pass Project key and Audience Id.
| Input Parameters | |
|---|---|
| Fixed | These are some pre-defined parameters which are helpful to identify your users. Ex:- Name, Email, Phone number, etc. |
| Variable | These are parameters created by you on project integration screen and will be used for filtering out your specific audience. |
| Project Key | Your unique Project Key generated for your Account. |
| Audience Id | This is primary key which will be helpful to identify your subscribers uniquely. |
| Output Parameters | |
|---|---|
| Status | This field contains the data submission status. It is “success” if data is saved successfully else it will “fail”. |
| ErrorDesc | It contains the error description if the status is false else it will be null. |
| Data | This field contains the audienceId for which data is updated. |
Google Form Connector
Integrate Google Forms with Cronberry
This document depicts the procedure of mapping your Google form leads data on Cronberry. Google Forms is a web-based app used to create forms for data collection purposes.
Step 1:- Go to https://docs.google.com/forms and create a form.
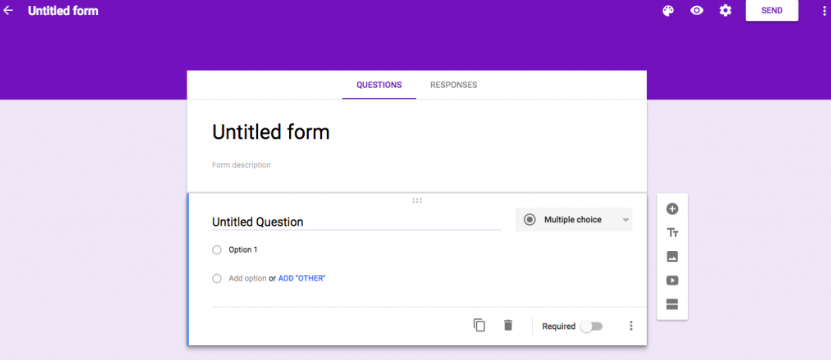
Using the form editor give your form a name and add your questions, one by one and set mandatory fields as required.
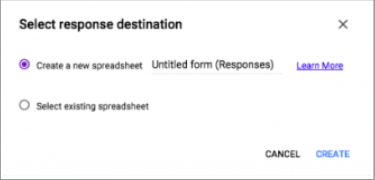
Step 2:- Create Google Sheet that is attached to your google form. First, on your form in ‘edit’ mode, click on ‘responses’ tab and then click on the green ‘create sheet’ icon on the right top corner.

And follow the prompt to create a spreadsheet. This will create your google sheet.
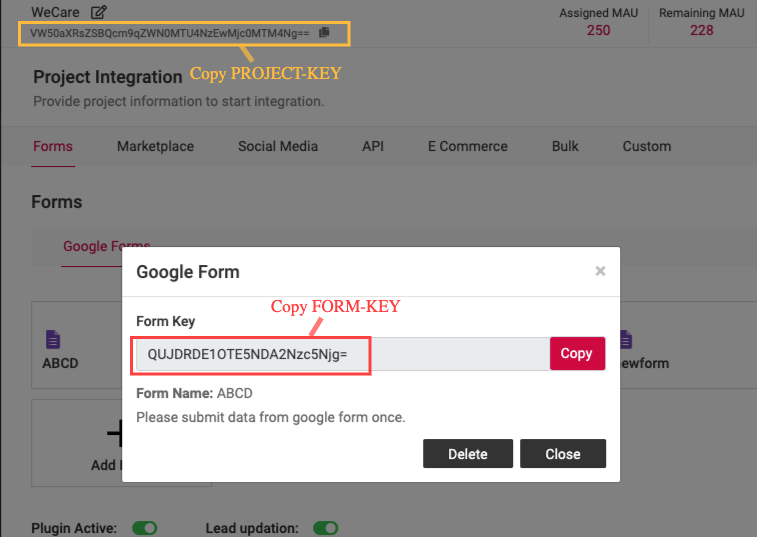
Step 3:-Get you Cronberry Form-Key and ProjectKey.
Copy the project key and the Form-Key generated on your Cronberry account as shown highlighted in below image.
Step 4:-Write a script to call the API
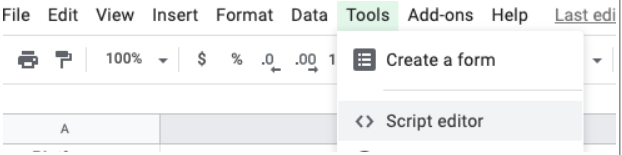
Open your Google Sheet and on the top menu go to tools > script editor.
Remove All the existing code from Script Editor.
You need to add below code in your script editor.
function googleForm(){{ '{' }}
var sheet = SpreadsheetApp.getActiveSheet();
var clientField = sheet.getRange(1,1,1,sheet.getLastColumn()).getValues();
var clientData = sheet.getRange(sheet.getLastRow(),1,1,sheet.getLastColumn()).getValues();
var data = {{ '{' }}
key: clientField[0],
value: clientData[0]
{{ '}' }};
var headers = {{ '{' }}
"Authorization" : "Basic Y3JvbmJlcnJ5QHVzZXJuYW1lOmNyb25iZXJyeUBwYXNzd29yZA=="
{{ '}' }};
var options = {{ '{' }}
headers:headers,
method : 'post',
contentType: 'application/json',
payload : JSON.stringify(data)
{{ '}' }};
UrlFetchApp.fetch('https://api.cronberry.com/cronberry/api/push/google-form/FORM-KEY/PROJECT-KEY', options);
Logger.log(JSON.stringify(data));
{{ '}' }}
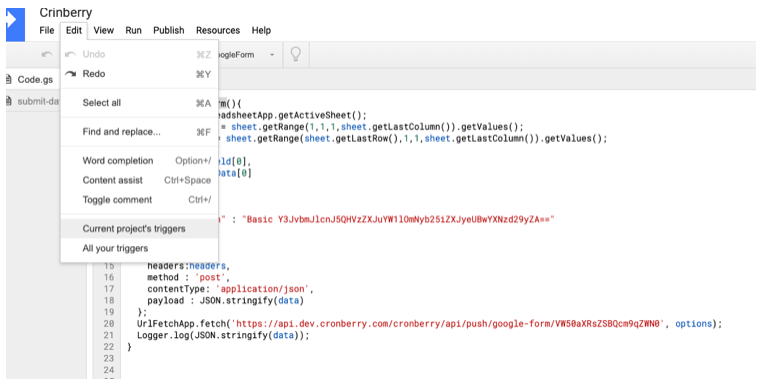
Replace FORM-KEY and PROJECT-KEY with the Cronberry form-key and project-key you copied in step3.
After copying the above script in script editor, Go to Edit > Current Project’s triggers.
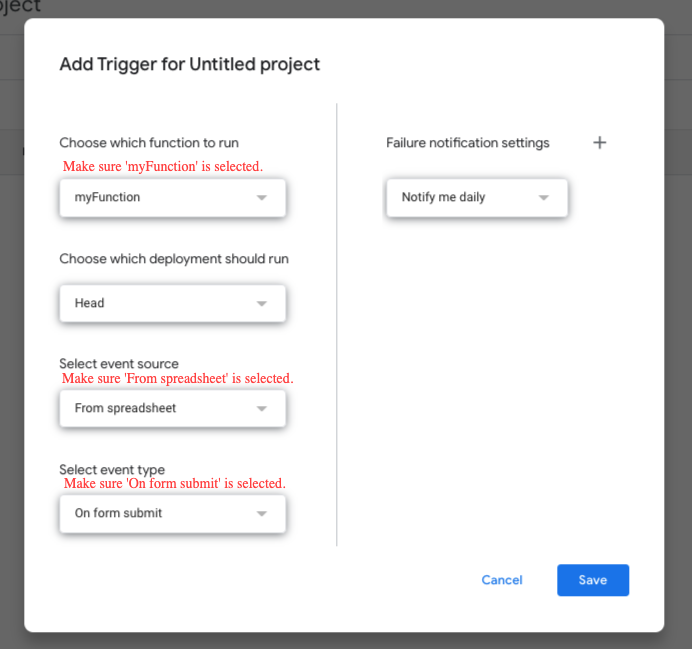
Now, You can add Trigger by clicking on the ADD TRIGGER button in the right corner bottom of the page.

For Adding Trigger, you need to select options as shown in the screenshot below and then click on the “Save” button.
Now your configuration has been completed.
Note* - Make sure that only one trigger is created for the Google Form. Since, multiple triggers will add duplicate entries in the record.
Step 4:- It is mandatory to submit the Data from your Google Form Once to check that data is getting pushed to Cronberry.
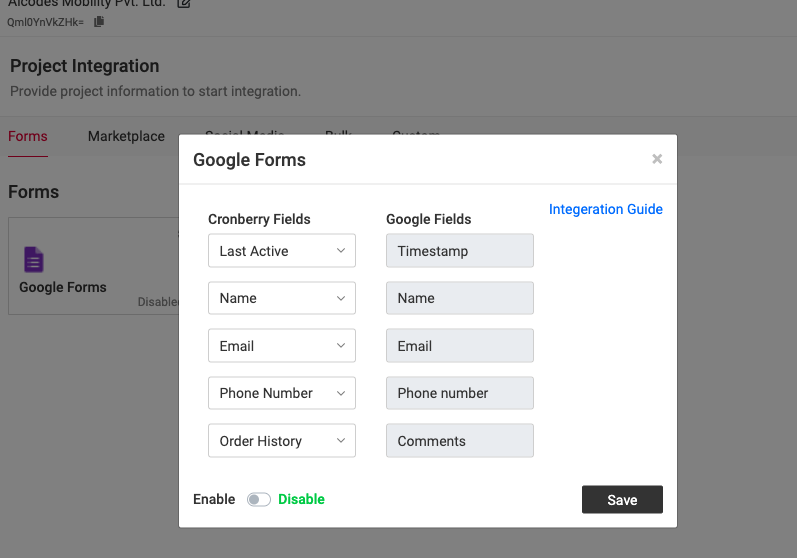
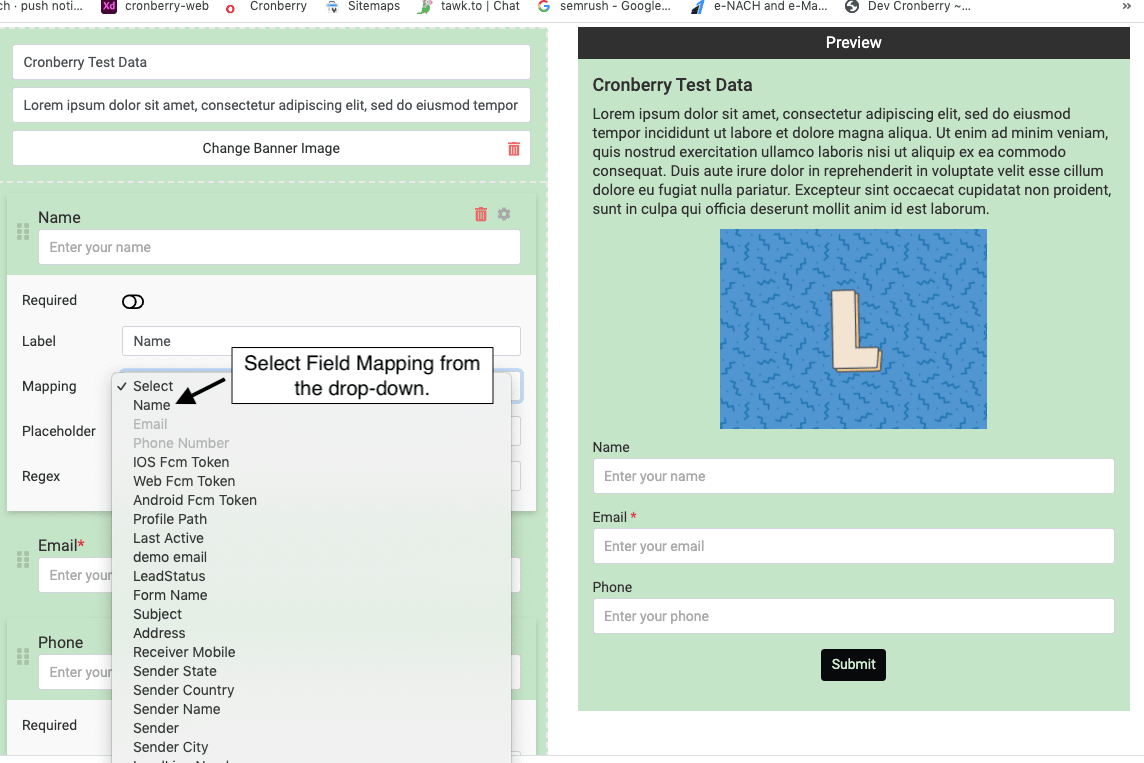
Once your form data is submitted, your google form fields will be automatically mapped with Cronberry fields as shown in below image.
Change the Field mapping as per your requirement and click on Save.
JustDial Connector
Integrate JustDial with Cronberry
This document depicts the procedure of mapping your JustDial leads data on Cronberry.
Requirement:
1. You must have admin account of JustDial to collect your leads on Cronberry.
2. You must be a paid user of JustDial connector on Cronberry.
Procedure:
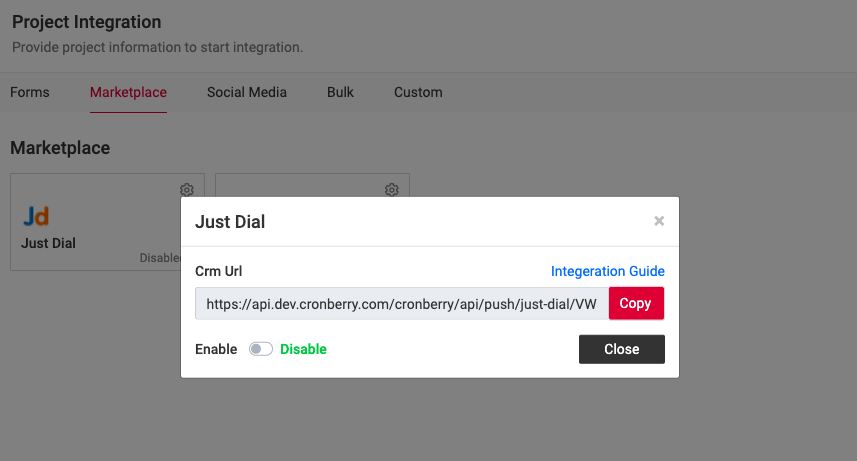
1. Go to Projects > Marketplace.
2. Click on JustDial then connector pop-up will be displayed.
3. Please provide this mentioned URL to your justdial provider and request them to post lead data on it. Once they start posting, leads data will be automatically captured in your Cronberry account.
4. Then your justdial leads will get started to capture automatically on your cronberry account.
Integrate IndiaMart with Cronberry
This document depicts the procedure of mapping your IndiaMart leads data on Cronberry.
Requirement:
1. You must have admin account of IndiaMart to collect your leads on Cronberry.
2. You must be a paid user of IndiaMart connector on Cronberry.
Procedure:
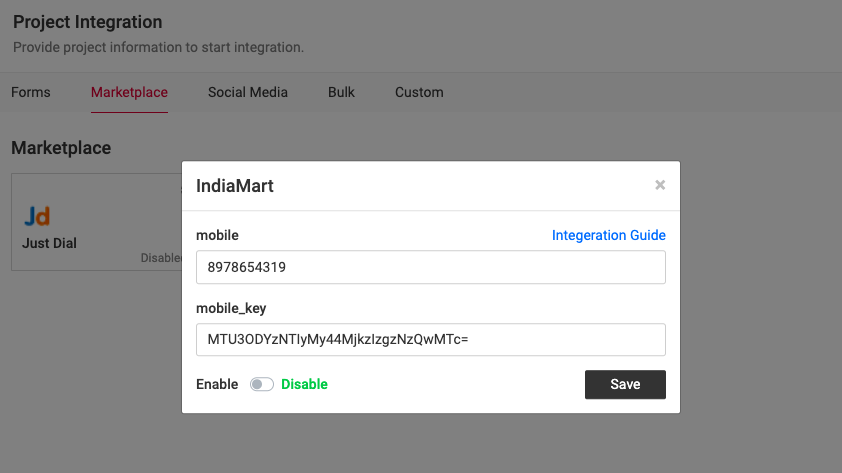
1. Go to Projects > Marketplace.
2. Click on IndiaMart then connector pop-up will be displayed.
3. You need to fill out below required fields:
Mobile Number:This is the primary mobile number of your account registered with IndiaMART. This is a mandatory input parameter.
Mobile Key:This is a unique key which is received on your primary email & mobile number. This is also a mandatory input parameter.
For Mobile Key, You need to login seller.indiamart.com and Go to Settings>Account Settings available on the left navigation and click on Generate Key. A unique CRM key will be received on your registered email-id & mobile number.
Note: On clicking ‘Generate Key’, a new key will be generated & older one will expire.
Integrate Shopify with Cronberry
This document depicts the procedure of mapping your Shopify store with Cronberry. Shopify is a cloud-based, SAAS shopping cart solution.
- On Shopify app store, search for Cronberry app. Now click on Add App button to integrate this app into your store.
- Then login to your Shopify store.
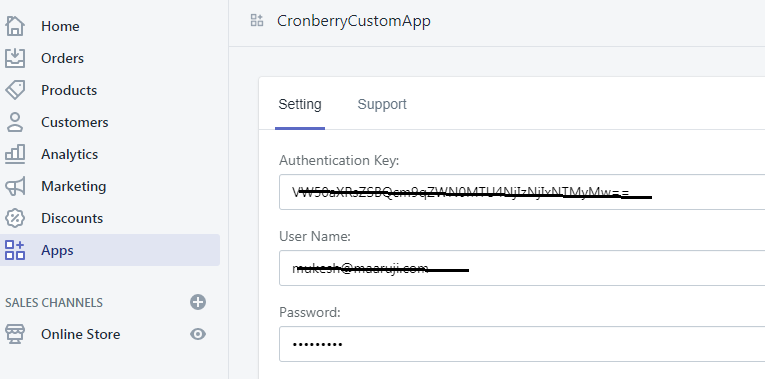
- After login, Go to Apps section and click on Cronberry app.
- Here you need to fill out below details.
-
Authentication Key:- This is the project key generated on your Cronberry account as shown highlighted in below image.
-
Username & Password:- these will be the same which is used for login into your Cronberry
account.
-
Firebase Setting:- For this information, you need to login your firebase account https://firebase.google.com/ then click on Go To Console button.

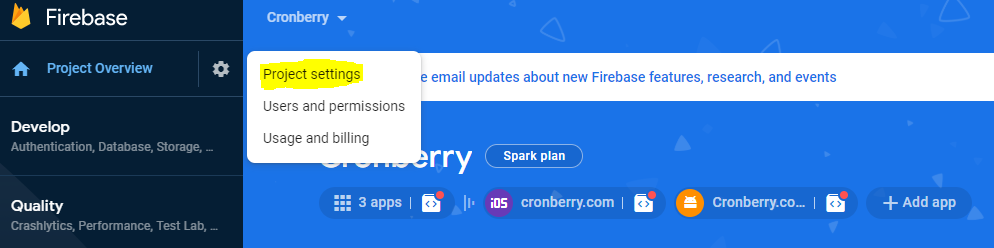
Then click on your listed firebase project. Under Project Overview > click on Project Settings.
In General section, When you will scroll down the page then all required Information you will get as per below screenshot.
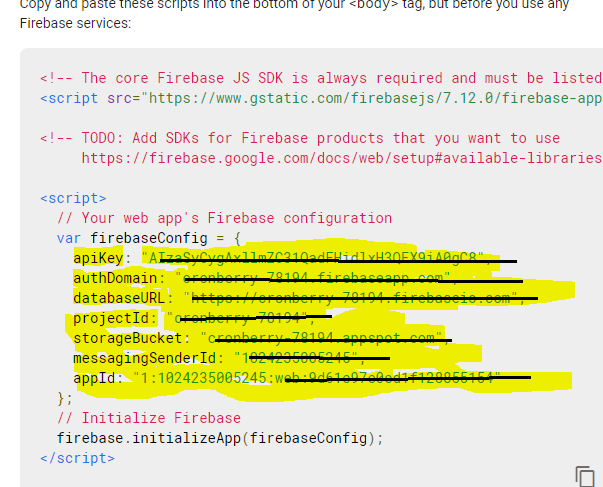
Please fill all these details in required fields as per below screenshot.
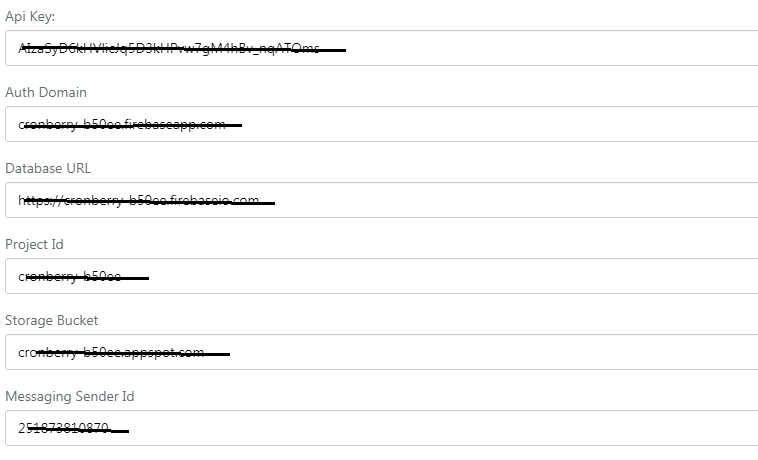
After filling all required details, click on submit button.
-
Authentication Key:- This is the project key generated on your Cronberry account as shown highlighted in below image.
- Now your configuration has been completed. On Cronberry Admin Panel, Go to Projects > E - Commerce. Click on Shopify connector and now you will be able to collect your Shopify store leads and engage them with Cronberry.
Integrate TradeIndia with Cronberry
This document depicts the procedure of mapping your TradeIndia leads data on Cronberry.
Requirement:
Pre-requisites - You must have an admin account of TradeIndia to collect your leads on Cronberry.
Procedure:
1. Go to Dashboard > Project Integration > Marketplace.
2. Click on TradeIndia then connector pop-up will be displayed.
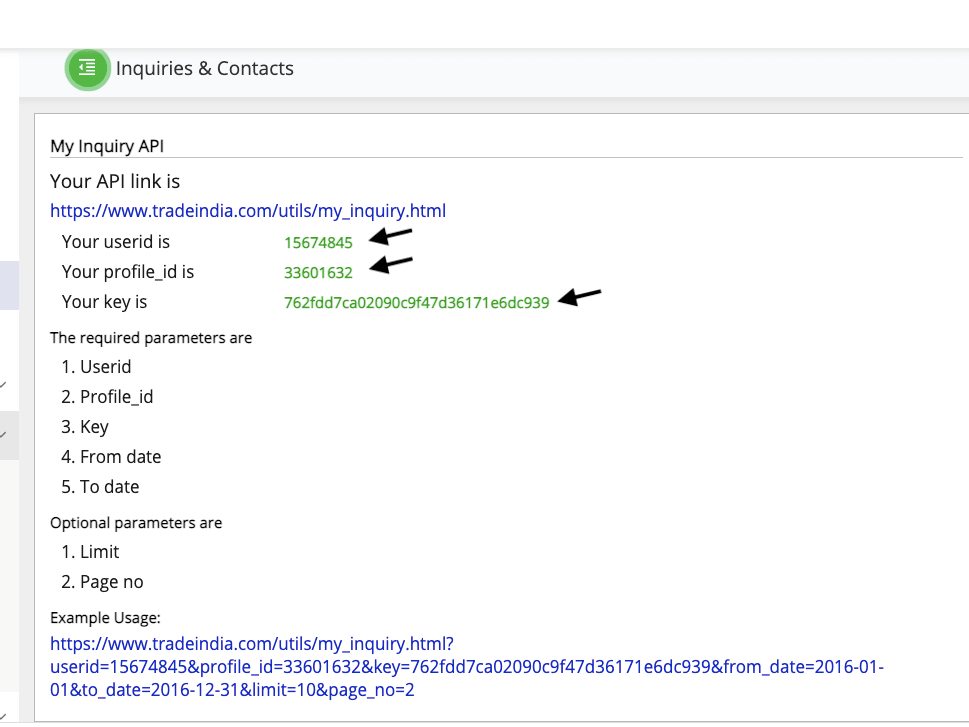
3. You need to fill out below required fields:
User ID, Profile ID and Key
4. Login to your TradeIndia account > Go To Dashboard > Inquiries & Contacts > My Inquiry API
Click on the SAVE button to save the configuration.
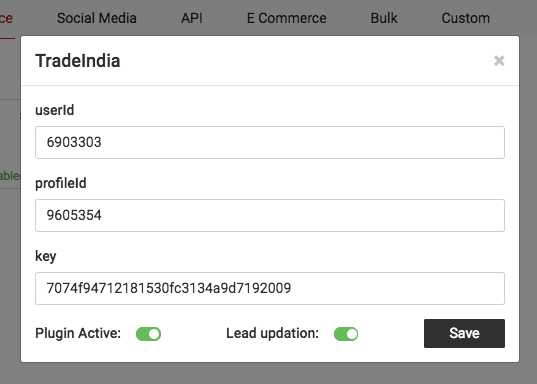
Plugin Active: This toggle is used to activate the plugin to fetch the leads from TradeIndia.
Lead updation: This toggle is used to assign the leads.
Integrate Custom Form with Cronberry
This document depicts the procedure of mapping your Custom Form leads data on Cronberry.
Requirement:
Procedure:
1. Go to Dashboard > Project Integration > Forms > Custom Form
2. Click on Add Form
3. To create a custom form, you need to fill out required fields.
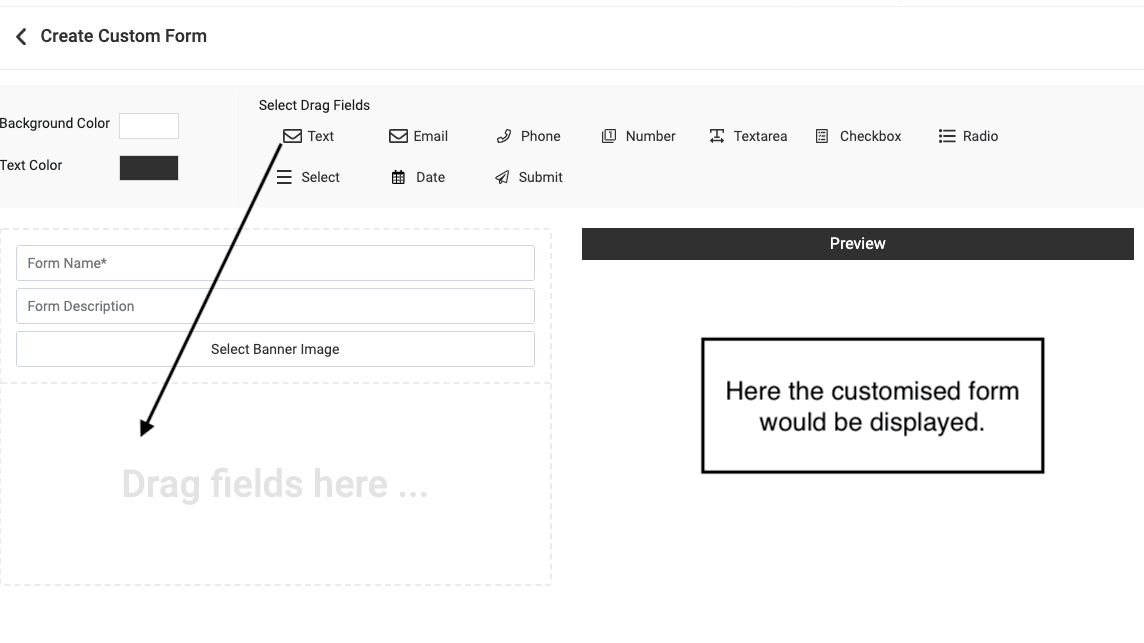
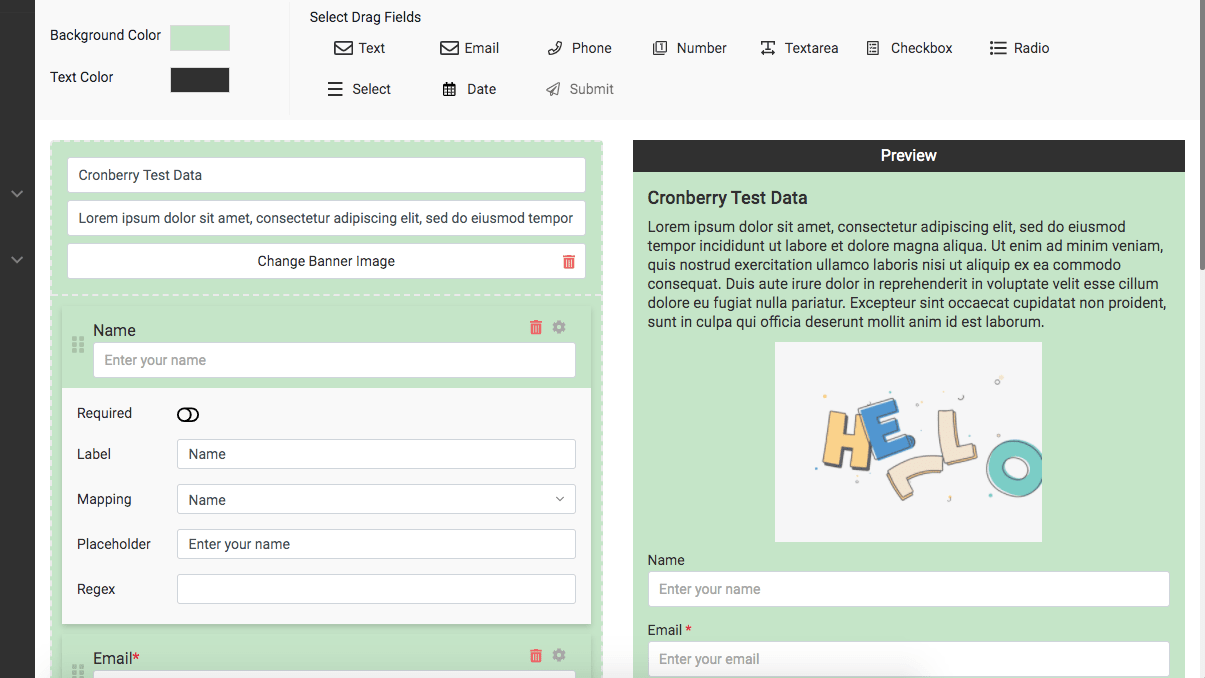
4. Click on the PROCEED button to create a custom form. Now you will be able to collect your Custom Form leads after submitting form details.
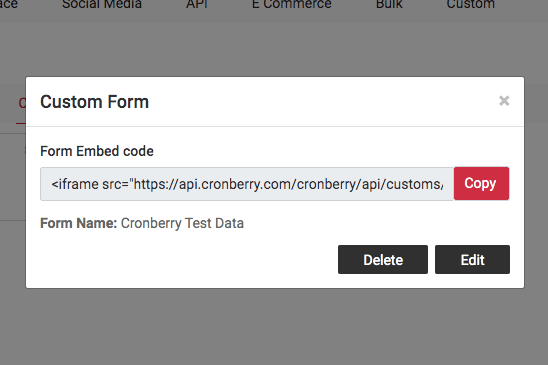
5. You can use custom form templates for creating Email Campaign, Create Email Templates and Announcement Popup.
Lead updation: This toggle is used to assign the leads.
6. Use cases of custom form :
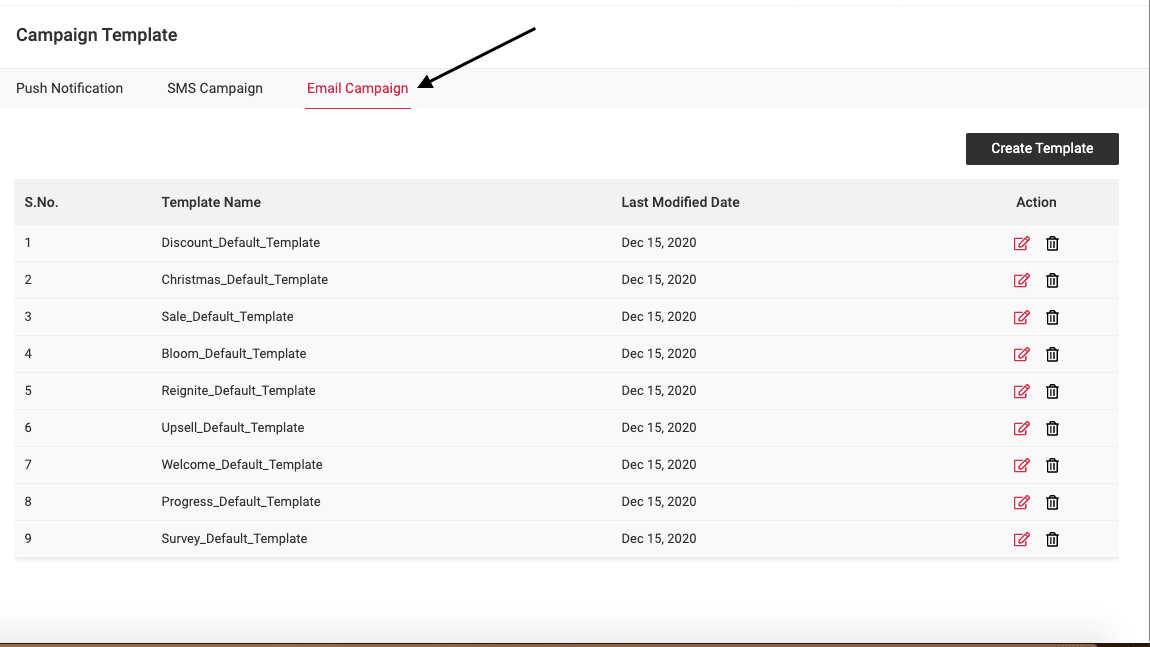
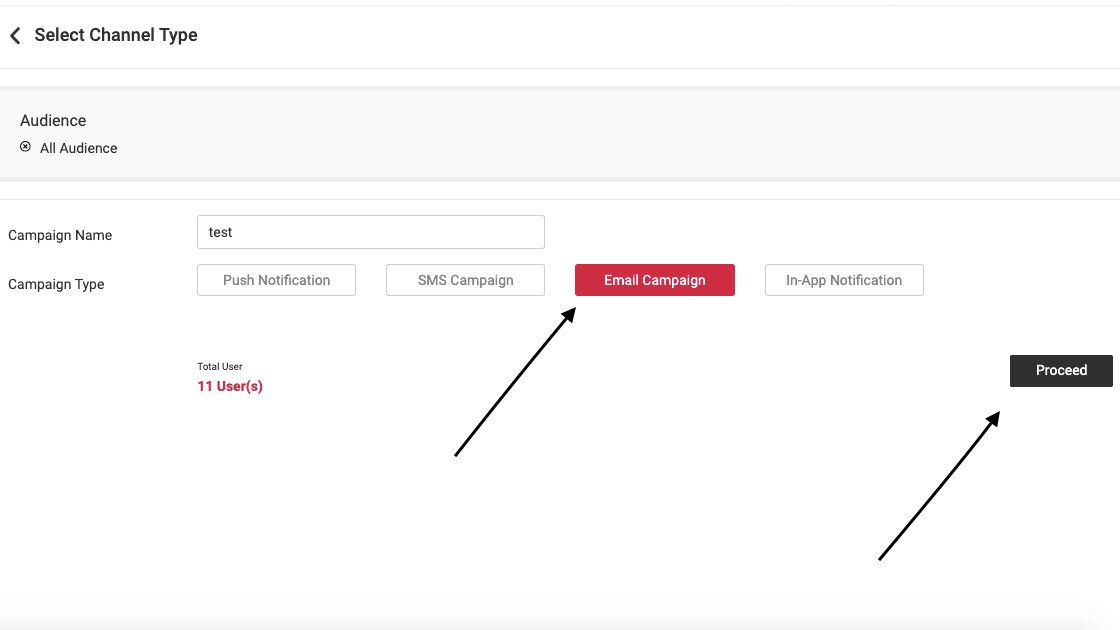
- Go to Campaign Template > select Email Campaign > select Create Template > select custom form media > add custom form template and fill out all required fields > click on Save.
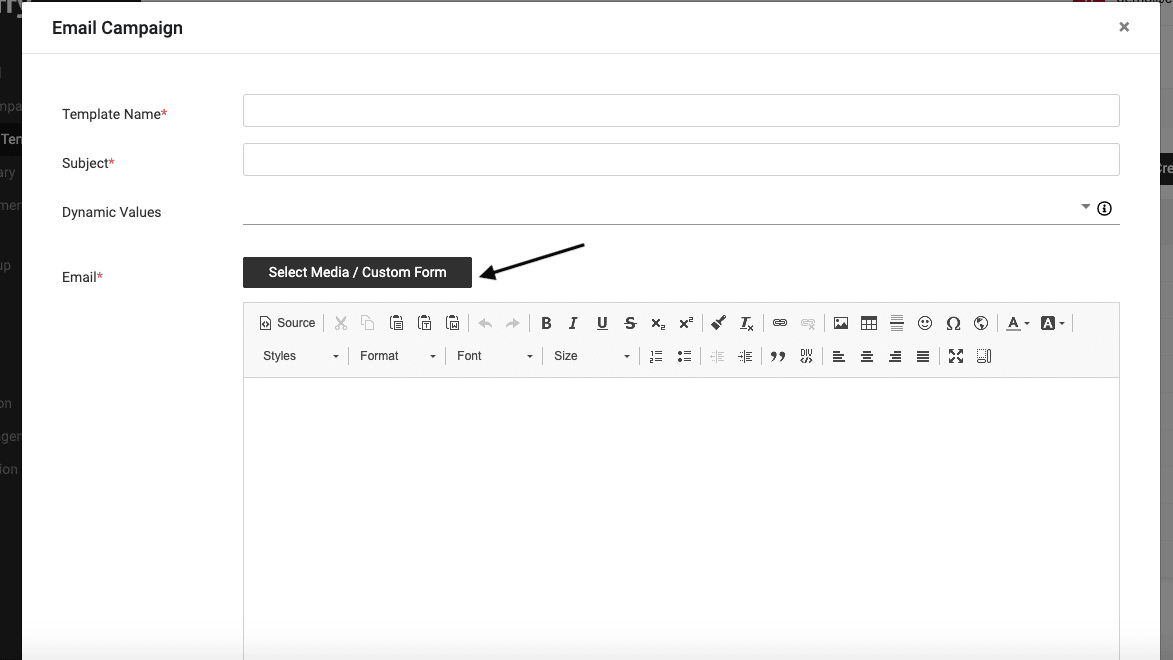
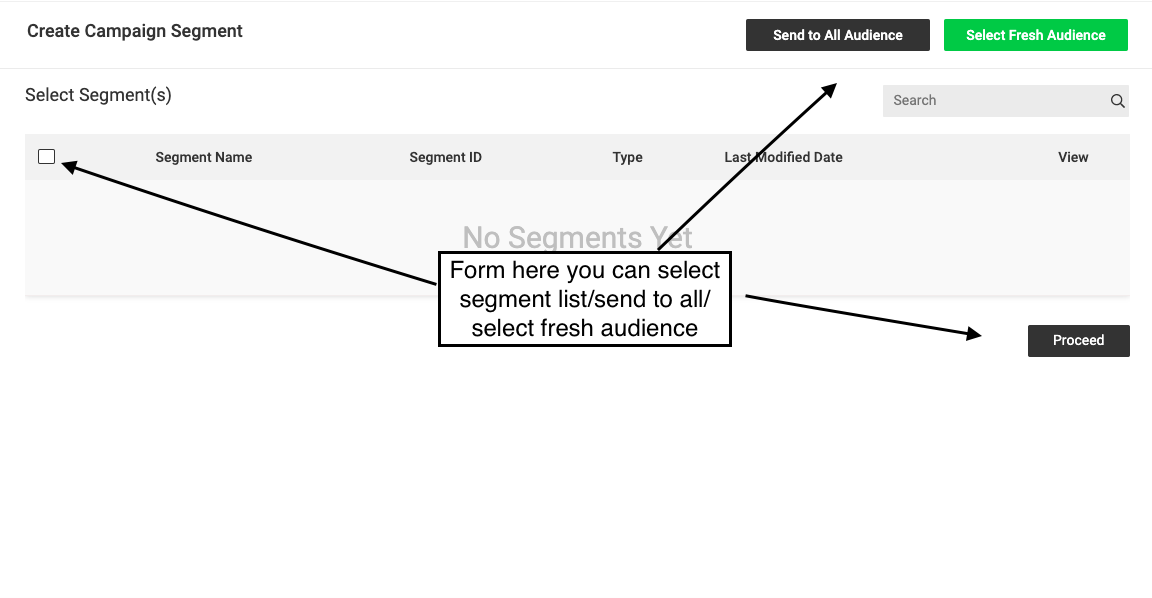
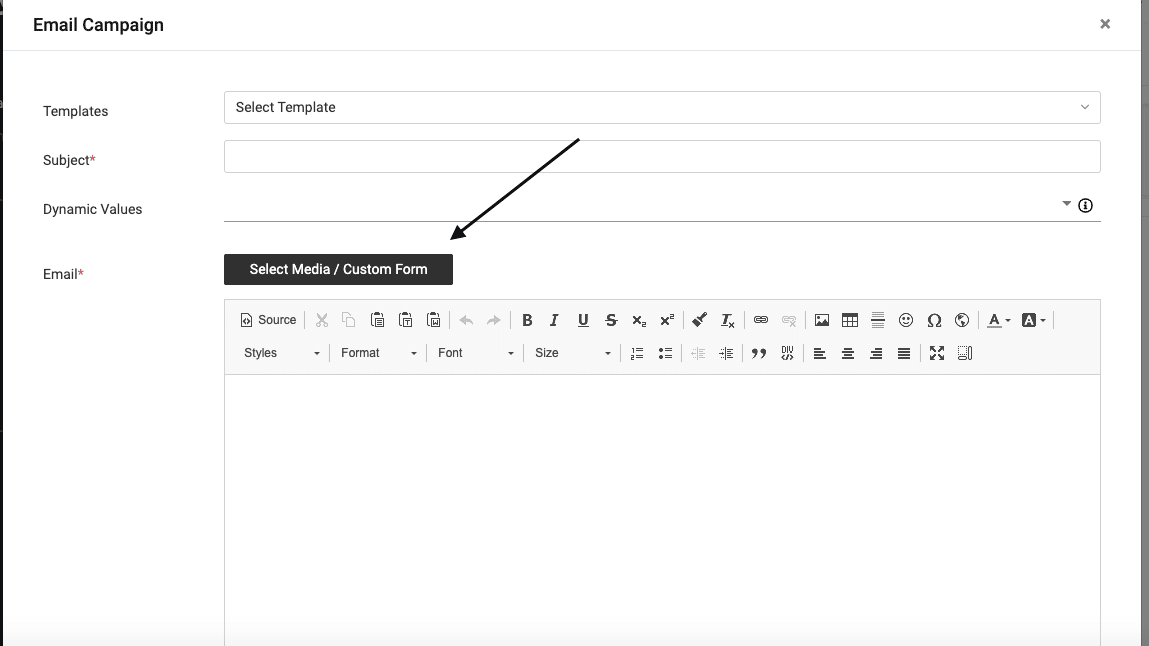
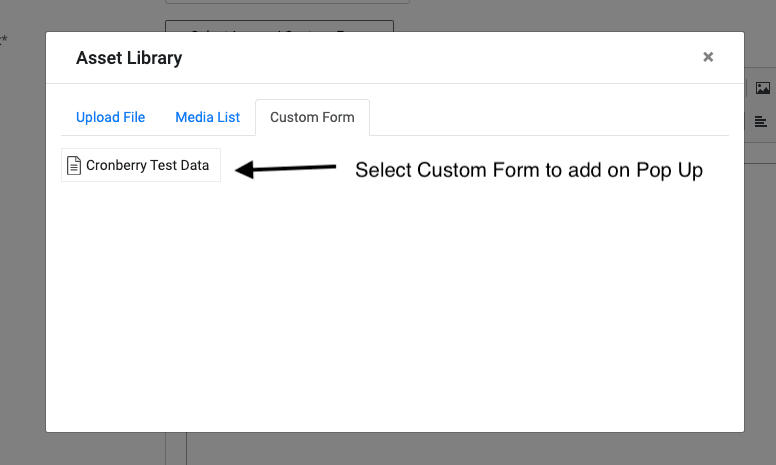
- Go to Create Campaign > select (send to all audience/select fresh audience/select segments) >select Email Campaign> click on Proceed > open Email Campaign popup > select custom form media> add custom form template and fill out all required fields > click on Send.
-
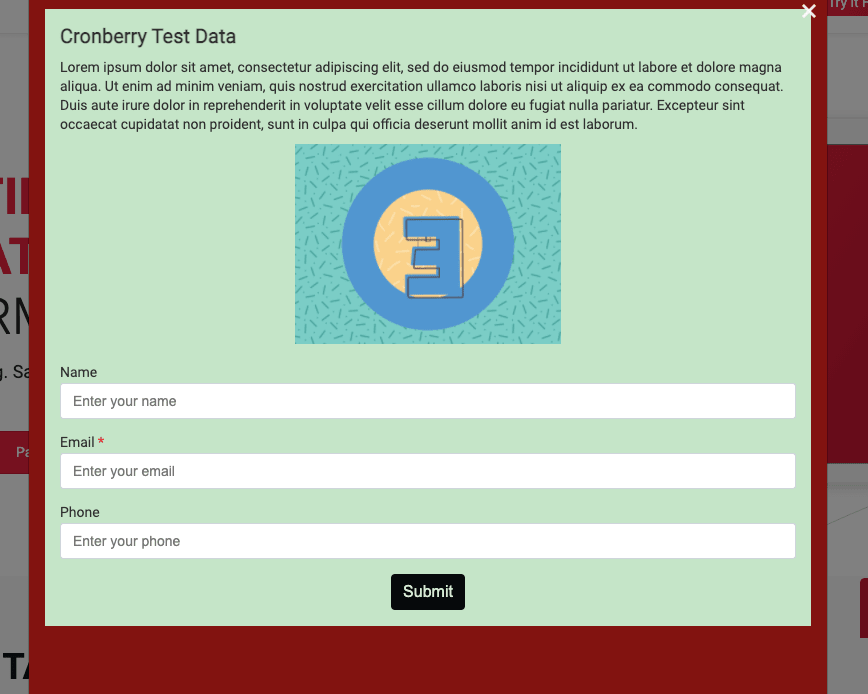
Open Announcement Dropdown > open Popup Page > select custom form media>add custom form template and fill out all required fields > click on Preview to check customised form > click on Publish button .
Integrate MyTelly with Cronberry
This document depicts the procedure of mapping your My Telly leads data on Cronberry.
Requirement:
1. You must have an admin account of MyTelly to collect your leads on Cronberry.
2. You must be a paid user of the MyTelly connector on Cronberry.
Procedure:
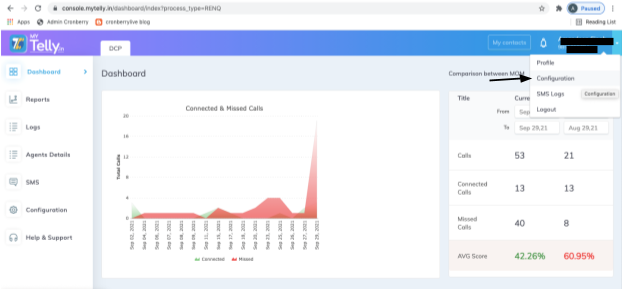
1. Login to MyTelly Dashboard
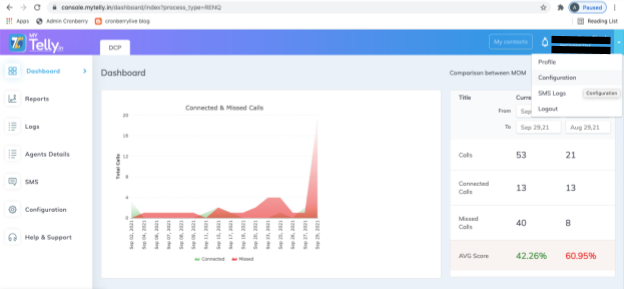
2. Click on the Profile icon and click the “Configuration” button
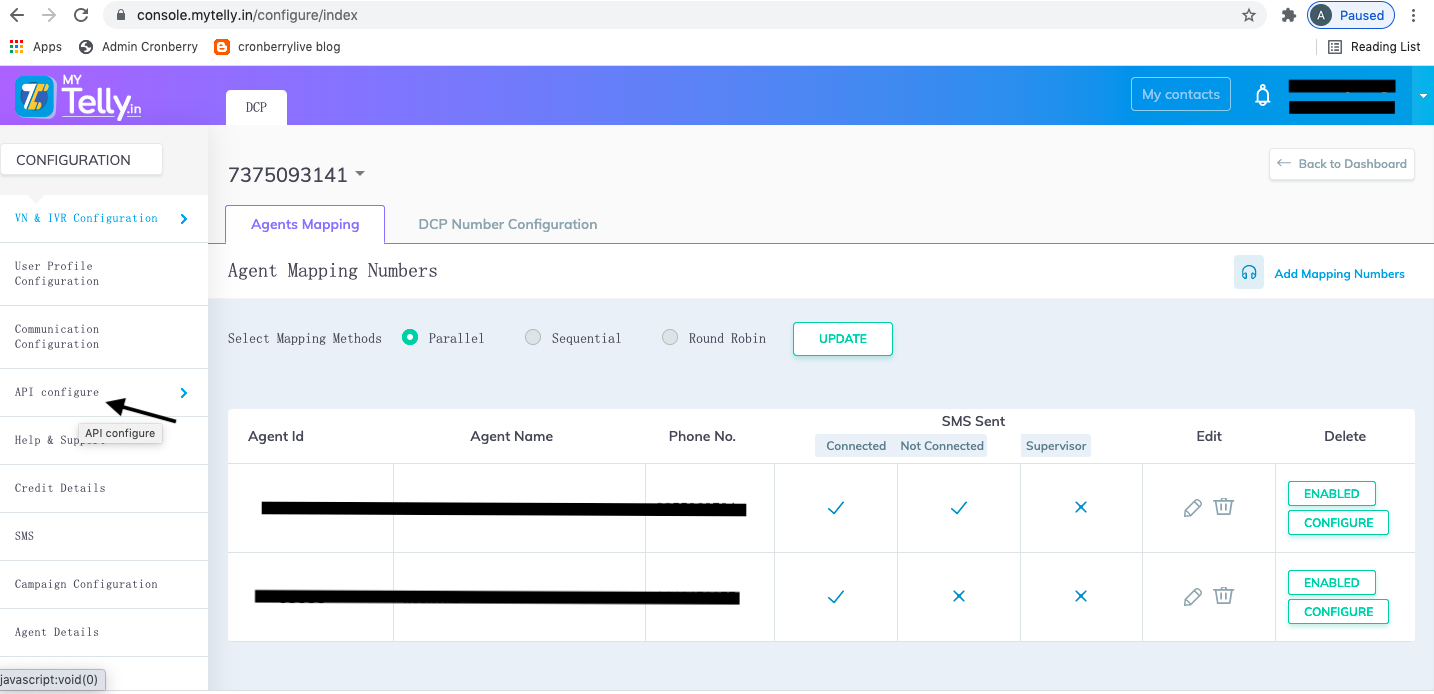
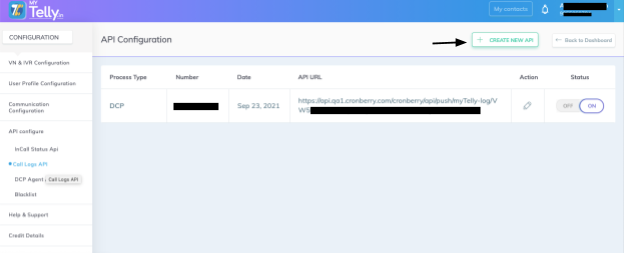
3. Click on "API configure"
4. Click on "Call Logs API"
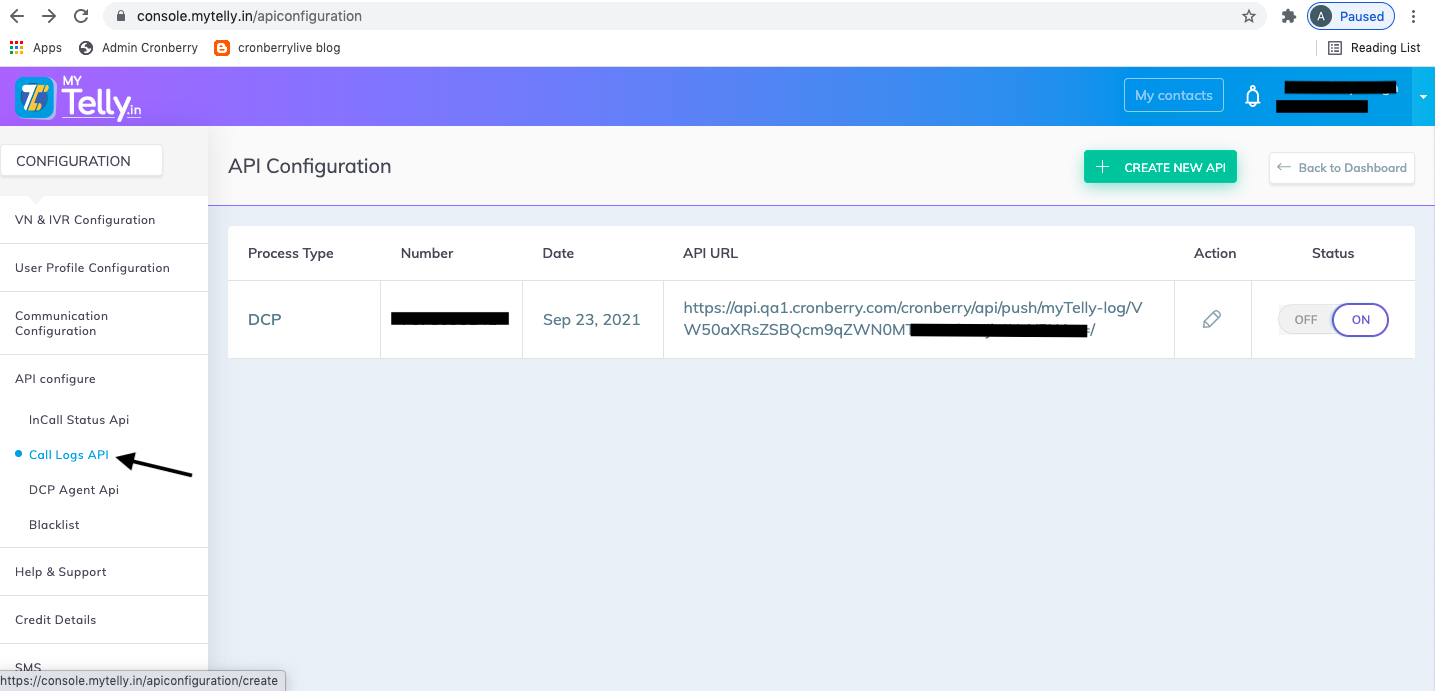
5. Click on "Create new API"
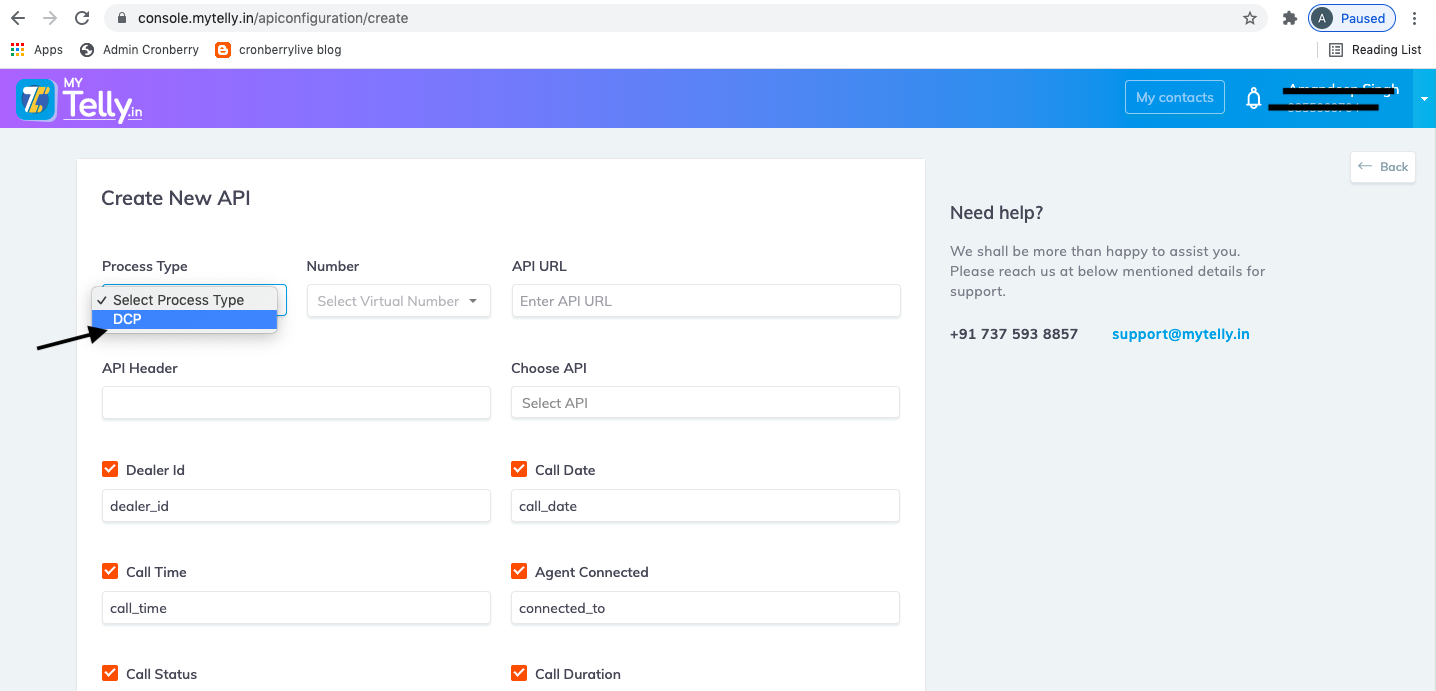
6. Select "Process Type" as DCP.
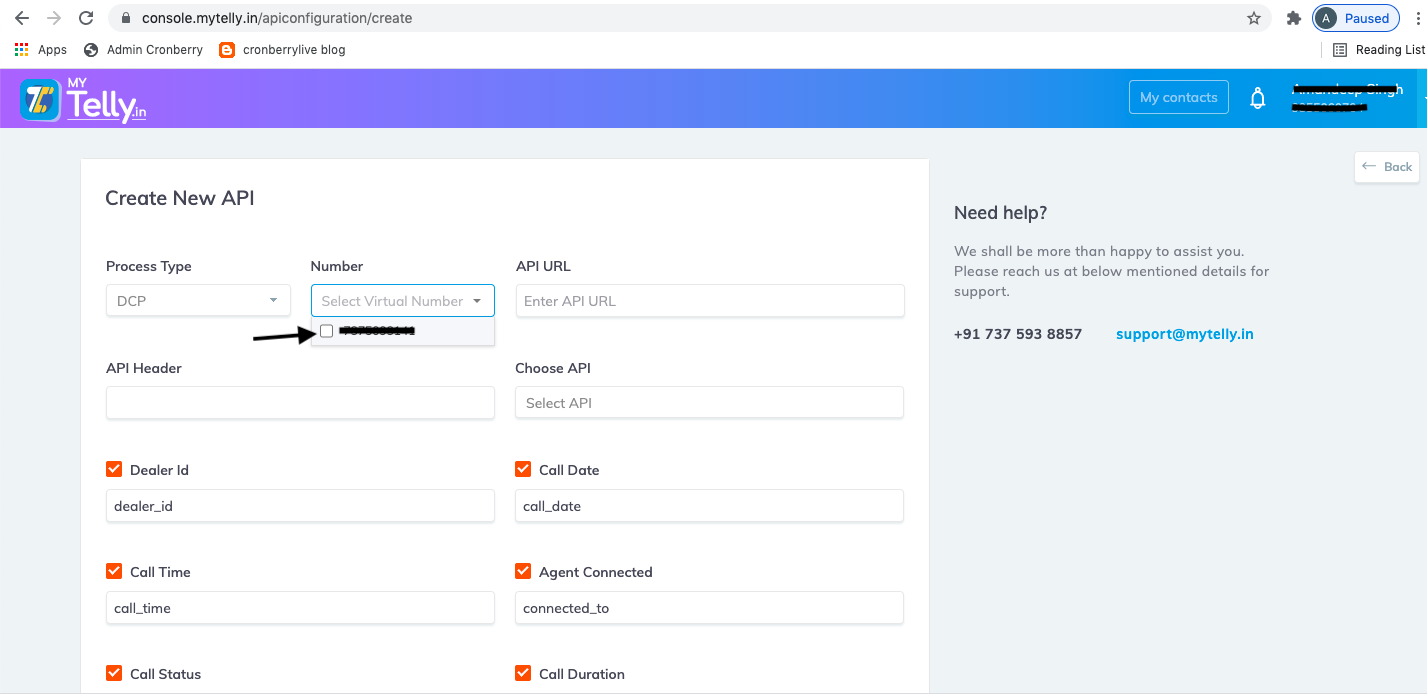
7. Select Virtual Number.
8. Copy API URL from Cronberry.
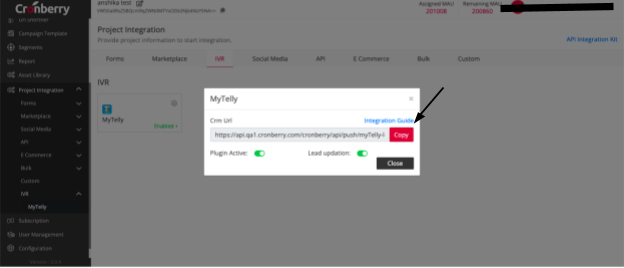
9. Enter Copied Cronberry API URL in My Telly account.
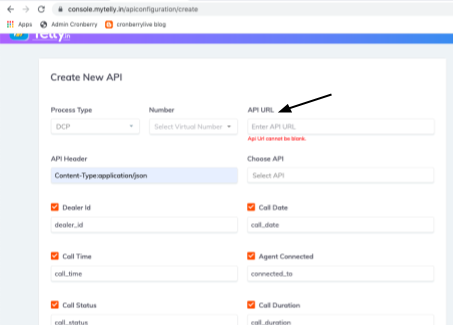
10. Type API header "Content-Type:application/json".
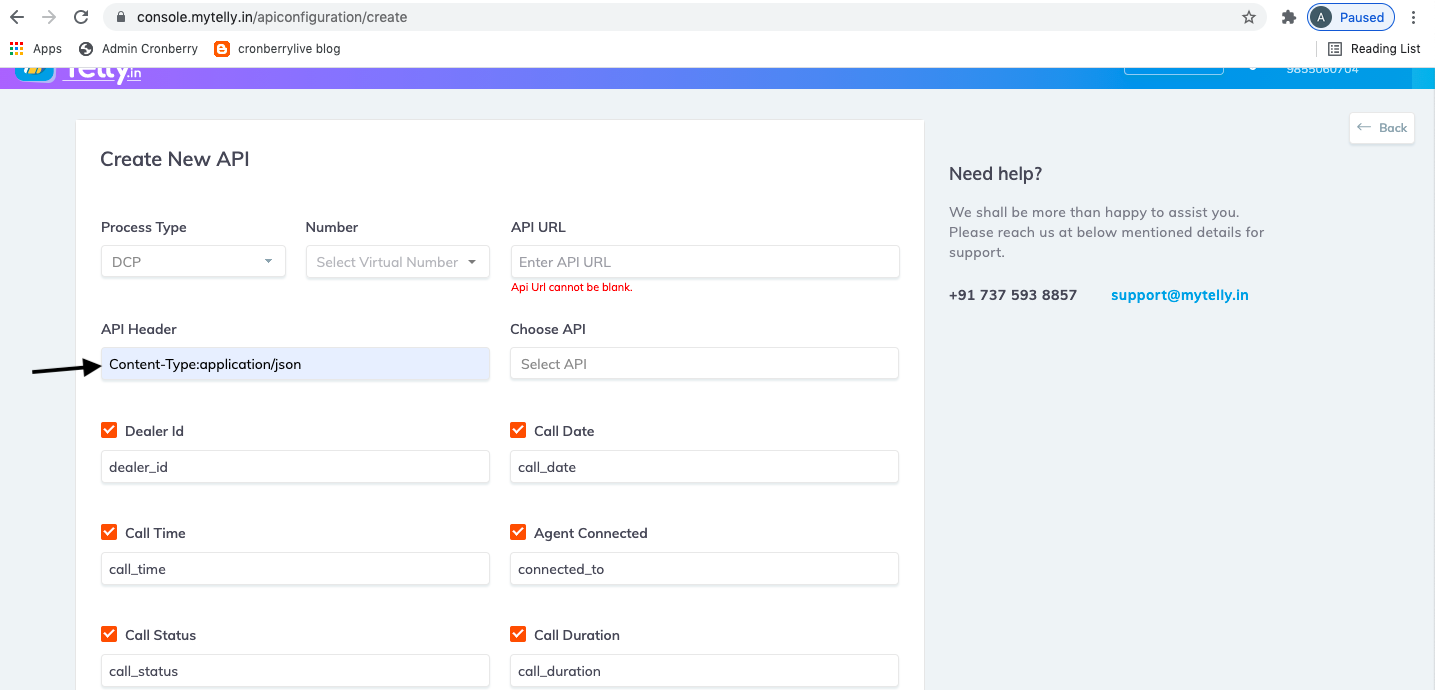
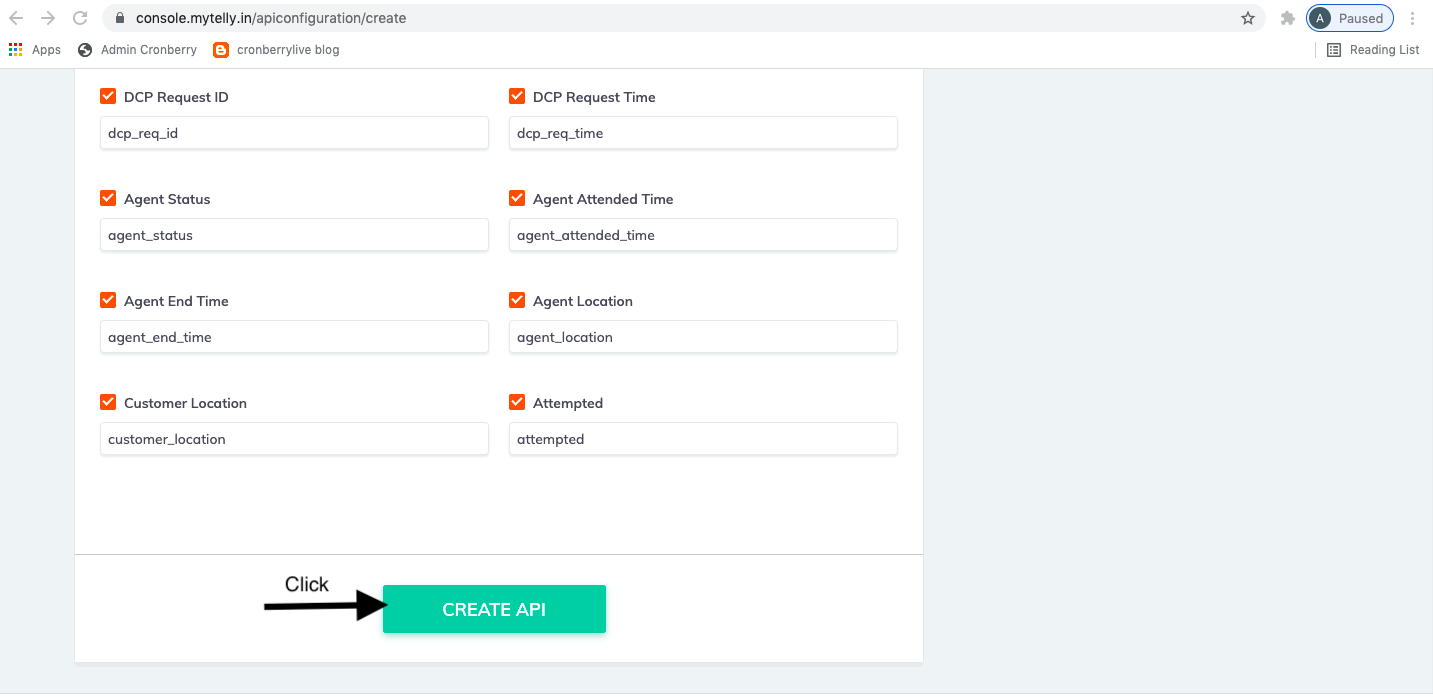
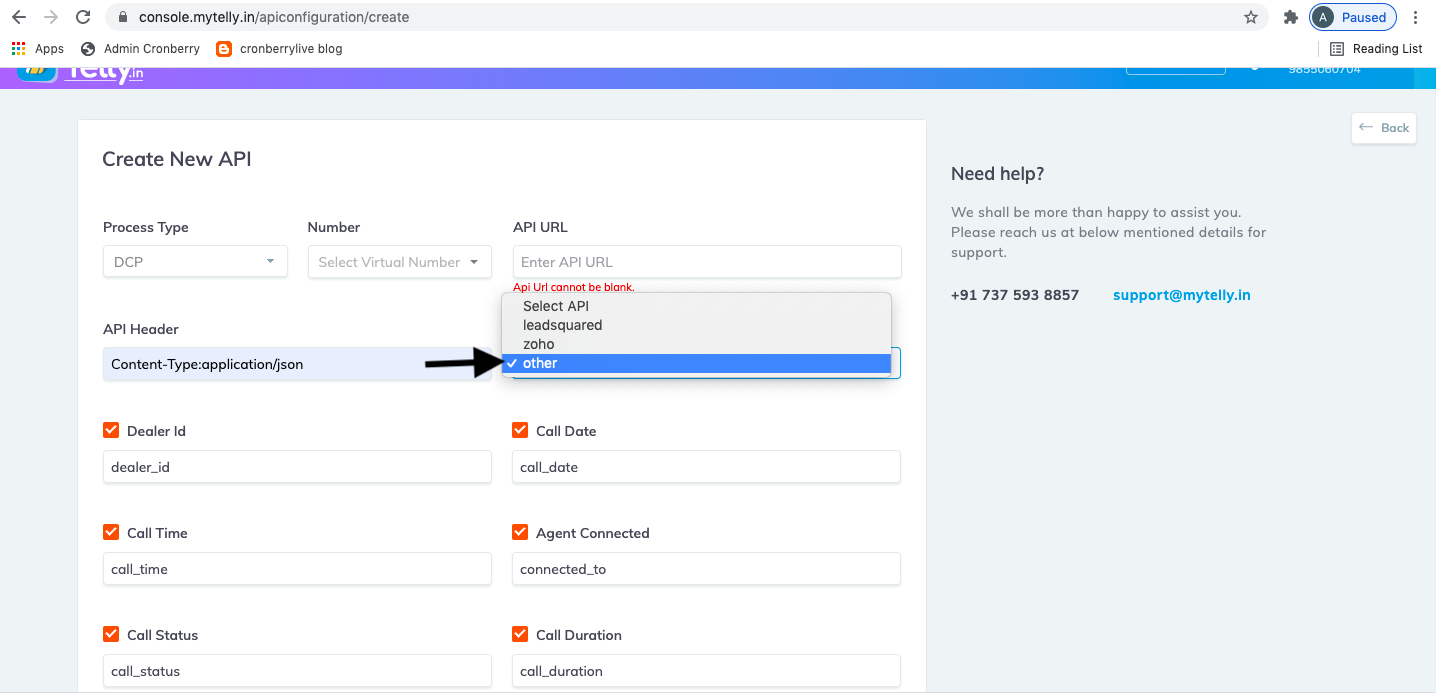
11. Choose API as "Other".
12. Tick Mark the call details you want to see on the Cronberry view audience section.
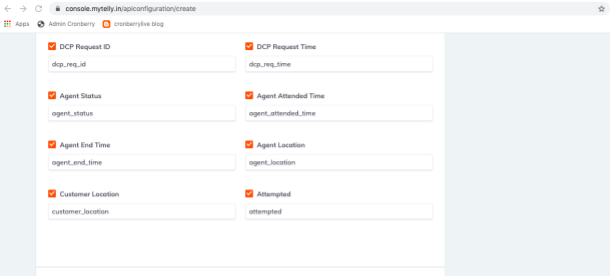
13. Scroll down and click on the "Create API" button.